1. On your BT Cloud Work Desktop App, click the Compose Fax icon.

2. Fill out the fields provided for your Fax message.
|
|
To: Enter the recipient's fax number, or you can select a contact by pressing the Plus  icon.
|
Cover Page You can select from the list of cover page templates if you wish to have a Cover Page Note sent, along with your fax attachment. You can click the view  icon to see the sample template. Select None if you do not want to include a Fax Cover Page.
|
|
Name
Enter the fax recipient's name.
|
|
Company
Enter the fax recipient's Company name.
|
|
Note
Enter your message in the text box provided. This message will appear in the Fax Cover Page.
|
|
|
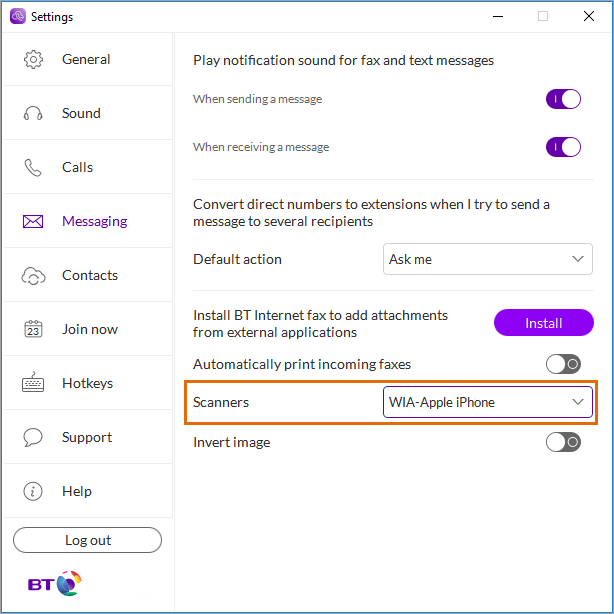
Scan You can scan a document to attach it to your fax message. This feature is for windows only. The Scan icon will be available when installed or connected. NOTE: A WIA-compliant scanner should be set in the Scanner settings of your BT Cloud Work Desktop App for this feature to work. To set up this feature, go to Setting up the BT Cloud Work Desktop App's Scan-to-Fax feature. IMPORTANT: The scanner needs to be properly installed, powered-on, and connected to your computer in order for the BT Cloud Work Desktop App to detect and recognise it.
|
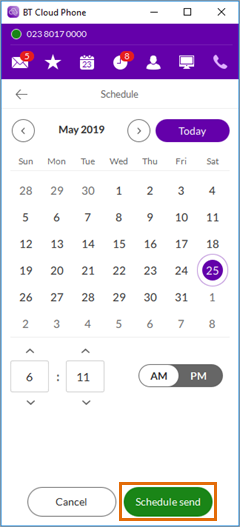
3. Click Send now, or Send Later.
NOTE: If you choose to send your fax later, you can select the Date and Time when want to send your fax message and then, click Schedule Send to add the fax message to your Outbox. The fax message will be sent automatically on your specified date and time.

1. On your BT Cloud Work Desktop App, click
Settings.

2. Click
Messaging, and then click
Install.
3. When your scanner is successfully installed, select from the
Scanners list to select the scanner that you wish to use.

See Also:

